
That way you can kind of justify buying new stuff like stamps heheeee ;-)
.
I volunteered to do the Christmas theme with Aaron's class (they celebrate EVERY holiday/tradition/occasion no matter what the race or theme, so it's been very interesting!!) I've helped out with a few of them, but this is the first one that I had my name as 1st on the list! That means I have to organise it hehee ... well I am kinda bossy, so I can do the organising! ;-)
.
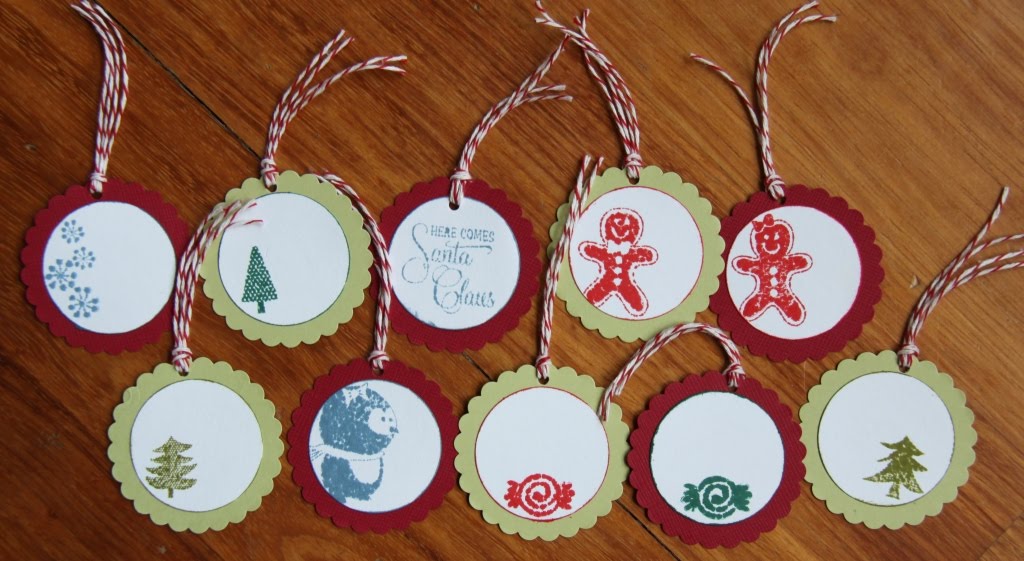
We (another couple of class Mum's are going to help) are going to be doing a couple of things. But one is we're going to be making Christmas cards and tags. So I thought of a real quick SUPER easy thing for them to do and get to use some tools and stamps, would be to make some little tags for Christmas presents. I've made up some samples ...
 Here's the tools you need ...
 Hole punch (I used my Crop-A-Dile big bite)
2" scallop circle punch
1 1/2" circle punch
Christmas stamps (I used American Crafts "shortbread small" acrylic set from here)
Inks (I used Distress inks in these colours - peeled paint, pine needles, barn door, stormy sky)
Bakers Twine (love the red - it looks like candy canes) :-)
Glue
Scissors
Scrap cardstock
.
Here's ONE of my scrap cardstock boxes. I have a couple and I also have a couple of patterned paper off cuts! So have a rummage through your scraps - I am sure you will find small pieces that will be just the right size for your punches :-)
 Here's a close up of the stamp set :-) Aaron's class did a gingerbread theme soon after they started and they are still talking about gingerbread men, so when I saw these I just couldn't resist!! :-)
 Aren't the gingerbread "people" just so cute :-)
 They are super simple to make - I actually punched out all the cardstock first - including the white circles. As the stamp set is acrylic it's easy to see where you are stamping and to line it up where you want within the circle. Once I had stamped the image I rolled the white circles in whatever coloured ink I had stamped the image with to define the edges (more noticeable on the green tag). Then I glued the white circle to the scalloped circle, punched a hole, cut some twine, threaded it through the hole and "bob's your uncle" it's all finished! :-)
.
I am a great one at leaving things like Christmas cards to the last minute ... and I'll be honest here ... I often make them and then they never ever get sent!!!! Shame on me! This year if I actually get around to sending any they will be ones I've made from previous years heheee (I have to tackle Samuel's thank you cards first though!!! But that's a job for another day!)
.
I'll show you the cards we'll be making with the kids after the event (it's in a couple of weeks).
.
Hope I have given you a fun & useful way to use up your scraps!! :-)
.
Thanks for visiting.
6 comments:
Super cute Christmas tags!! They are easy to make and what a great way to reduce those paper in the stash box during this festive season! Lots of possibilities for this little tag :)
I am guilty of that last raya, I made cards and did not send them till last week gosh the guilt was literally killing me!! hehehe
ahhhh am able to blog crawl at last!
love the stamps esp the girl gingerbread one..heheh love her bow.
What a nice project that you will be organising. Those stamps are nice and thank you for sharing Rachel!
go you ... have fun 'teach' ...
cute tags and it sounds like you have a great idea for the kids. They are going to love these.Whooo hoo at Master Samuel being on the move, thats awesome.
lovely tags! so easy to make, and for a good scrap clearing reason too! Did you let the children help you punch those circles out? I'm sure they'll have a blast!
Post a Comment